-->

Mobile hardware problem, solution

Showing posts with label Android. Show all posts

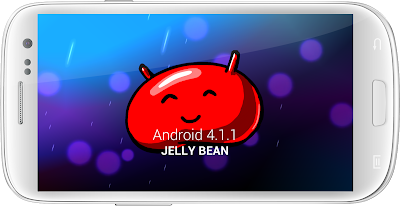
Install Android Jelly Bean 4.1.1 on Qmobile Noir A8 download now

Install Jelly Bean 4.1.1 on Qmobile Noir A8 download now

http://alllatesthardwaresolution.blogspot.com

Warning: Follow the guide at your own risk, We will not be held responsible if anything goes wrong by following the steps mentioned below

Installing Jelly Bean 4.1.1 on Qmobile A8 procedure:


  1. First of all make sure your phone is ROOTED. If it’s not, follow out guide on
  2. Now install ClockWorkMod Recovery from Google play or anyother external site on your Qmobile Noir A8.
  3. Download one of the following two ROMs:
IncPak’s Jelly Bean 4.1.1 ROM for Qmobile Noir A8 [Link 1] [Link 2]
WinGoku’s Jelly Bean 4.1.1 ROM for Qmobile Noir A8 [Link 1]
I recommend the Incpak's ROM as it is running on 2 of my phones...
  1. Now copy this download .zip file to your SD Card;
  2. Power Off your Noir A8;
  3. Boot your phone into Recovery mode: Hold down the POWER + VOLUME UP buttons, release the POWER button when you see the boot logo;
  4. Make a backup: select backup and restore, then backup. When it is done select Go Back;
  5. Now perform the following Wipes:
    Select Wipe/Data Factory Cache;
    Select Wipe Cache Partition;
    Go to advanced and select wipe dalvik cache;
    Go back to the main menu.
  6. Now select Select Install zip from sdcard, then Choose zip from sdcard and then select the .zip file that you copied to your SD Card and select Yes;
Once the installtion is completed, your Qmobile will reboot into JellyBean 4.1.1.
Please leave you feedback on this guide.Thank you
Share:

How to Flash LG Optimus LTE LU6200 to Android 4.0.4 ICS

How to Flash LG Optimus LTE LU6200 to Android 4.0.4 ICS

You will need to download the following files:

How to update LG Optimus LTE LU6200 to Android 4.0.4 ICS Steps:
Cable into the PC and phone theft: USB Debugging and select Unknow soure slightly.
Unzip and run Windows Enabler.exe WindowsEnablerv1.1.zip, Click on the icon in the taskbar to switch On (see figure below)

Run File d: \ FlashTool \ UpTestEX.exe


This step is the "Start Upgrade" you do not choose. you start by choose " Normal Web update test"


This step may choose another Language replaced by Chinese:


Start running:
If errors occur, then you put the machine on the DOWNLOAD MODE (remove the battery, theft cable, press the "volume" with "Power Button" few seconds)


wait until this is done


Caution: I am not responsible if anything happens to your LG Optimus LTE! Do this at your own risk!

Share:

Mtk Android IMEI Repair With Usb

Mtk Android IMEI Repair With Usb
MICROMAX A50 MTK 6573

OLD IMEI


PRESS REPLACE IMEI


FILL IMEI AND PRESS YES


PRESS OK


PRESS REBOOT


REPAIR IMEI DONE


https://disk.yandex.com/public/?hash...4vSebBzlQ9s%3D

DepositFiles
Share:

Install Bangla Font on Any Android Devices

Install Bangla Font on Any Android Devices

Most Bangali User wants Bengali language support for their Android Samartphone.

Here is an app that can install bangla font in any android devices


Download Bangla font

Installation : (For Samsung Only )
  • Download the file in your PC and transfer to Phone
  • Open the downloaded file by tapping, in your device and Install
  • Go to Settings > Display > Font style and Select BanglaFont, tap OK then tap “Restart now”.


Installation : (For Other Android )

Just install and forget . Its done for you .

Now How to write bangla in Any android ?

First install this font to your phone its impotent because without it you wont be able to read bangla in Android Market and then download any keyboard from below & Install it.


Another Method For install bangla font in your android devices...

1.Download solaimanlipi2.0.ttf(new version) font. Rename it to DroidSansFallback.ttf
2. Go to your device's system>fonts> folder and replace the "DroidSAnsFallback.ttf" font with yours. Use file manager that can access you root folders such as: root explorer or file manager HD
3. Restart your device and it should be rendered with native bangla support.

DOWNLOAD Solaimanlipi Font

Enjoy...

NOTE: Many android of symphony and walton has bangla support .. thats mean you can read bangla without installing any font ... like w60 .. but if your android fails to do so then use the flowing application to make it works.
Share:

how to install Bangla font for all Android smartphones

  • Download this apps & install it on your phone Custom Android Font Switcher
  • Download Solaimanlipi Bangla font for better rendering
  • Copy the downloaded font to SD card
  • Then Open Custom Android Font Switcher & tap Local
  • Now select Solaimanlipi font from SD card
  • Your set will automatically reboot
  • Done.
Share:

How to remove your pattern lock

How to remove your pattern lock


Share:

Android Driver In Windows XP/Vista/windows7

How To Install MTK Android Driver In Windows XP/Vista/windows7

Many MTK or mediatek device users facing problem in installing driver for their phone, so I have decided to share "how to install USB VCOM DRIVER in windows 7/Vista/Xp". This tutorial is mainly for micromax a25/a44/a52 and many other MTK android phones.


HOW TO INSTALL VCOM DRIVER :


  • First of all download USBdeview from below
  • Now extract USBdeview_droidtricks.zip
  • Open USBdeview.exe as administrator
  • Now follow my screenshots and uninstall PreLoader USB VCOM and also Micromax a25 USB driver


  • Now again uninstall PreLoader USB VCOM which is located below in USBdeview


  • Now restatr your PC
  • Again open USBDeview as administrator
  • Now connect your MTK device(eg. Micromax/Samasung/LG) by removing battery from it
  • Your windows search for driver ...
  • If automatically install your driver by windows then you need not have to follow the next steps


  • Automatic installation occurs if you have installed previously
  • Now Go to Device manager if automatic installation does not occur
  • Now look at the picture below and click right mouse button and press update driver software


  • A window will come
  • Select "browse my computer for driver software"
  • Now browser your USB VCOM DRIVER PATH and install driver

Download(Driver)


Download(USBdeview)
Share:

Software Xtouch > Download

Share:

How to Root Karbonn Smart Tab 8 Velox and Smart Tab 10 Cosmic

Today our tutorial How to Root Karbonn Smart Tab 8 Velox and Smart Tab 10 Cosmic with crystal rooting tool. If you look at the current tablet segment in Indian market then you would realize that two Karbonn Smart tab 8 velox and smart tab 10 cosmic are indeed great Android 4.1.1 Jelly Bean devices for the price. Both these tablets are performing exceptionally well due to the dual core processor. There is small difference between them in terms of camera since Karbonn smart Tab 8 Velox is packed with 2MP snapper whereas Tab 10 Cosmic has 3 MP snapper. Most of the hardware specifications of these two tablets are very much similar except the fact that smart tab 8 velox lacks dedicated GPU.
Well, it’s time to move on to the actual focus rather than talking about specifications of these two tablets. This simple guide will let you root Karbonn smart tab 8 velox as well as smart tab 10 cosmic and will allow you to unleash the true potentials of android device. After rooting the device you can do great things like installing clockworkmod recovery mode which helps to flash custom based ROM's.
Requirements

This rooting tutorial will only applicable for both Karbonn Smart 8 velox and tab 10 Cosmic. Don't try to apply on other karbonn smart tabs.
You've enabled USB debugging.
The current battery level is more than 75%.
Rooting voids the warranty of your device.
No one is responsible for the damage that may cause by following this guide.
We will make sure that you don't damage your device and would also help you if you do so mistakenly.
Download the Crystal Rooting tool from here zip file size will be 578 KB. Don't try to extract the zip file.
Steps and Procedure to Root Karbonn Smart Tab 8 or 10
1. First step did you tick the box saying USB Debugging? If not, you must do the same before going ahead because it does help in situations when you brick your device. You can enable this option by going into Settings > Development options.
2. After enabling the USB debugging. Connect the tab to PC and copy the rooting zip file into the root directory of external SD card storage.
Note: Please don't place it in internal memory because it won't be detected if it is placed under internal memory.
3. Now it's time to turn off your tablet. Again Press Volume Down and Power keys simultaneously till the time Karbonn logo is displayed on your screen.
4. This will take you to the stock recovery of Karbonn ST8 and ST10.
5. Use the volume up and volume down buttons to navigate up and down and power button to make your selection.
6. Scroll to the third option called Apply Update from EXT and browse to the location where you've placed rooting zip file in the external SD card. See the below picture then you will get an idea.
7. Select the file and confirm flashing.
8. Within few minutes the flashing process will finish and you'll have a rooted Karbonn Smart Tab 8 or Tab 10 in your hands.
How to check if the tablet is rooted or not ?
It’s easy to check if the tablet is rooted or not. Simply download an application from Google Play store “Root Checker”. It will perform its tests and let you know whether you've rooted successfully or not. Also, you can also check for the same
Do let me know in the comments below if you’re not able to root your Karbonn smart tab 8 or smart tab 10 successfully. I will definitely try my best to clear the doubts.
Share:

Android Secret Code

Some of the Android Secret Code


* # 06 # - IMEI number will be displayed.

* 2767 * 3855 # - factory reset code (phanera all data will be deleted)

* # * # 4636 # * # * - Phone and battery information.

* # * # * # * # 273282 * 255 * 663282 * - all media files are backed up to code.

* # * # 197328640 # * # * - Service Test mode code.

* # * # 1111 # * # * - FTA software version.

* # * # 1234 # * # * - PDA and firmware version.

* # * # 232339 # * # * - Wireless LAN test code.

* # * # 0842 # * # * - Test code for the tail lights and bhaibresana.

* # 12580 * 369 # - Software and Hardware Information.

* # * # 2664 # * # * - Touch screen test code.

* # 9900 # - System Dump Mode.

* # 9090 # - Diagnostic configuration.

* # * # 34971539 # * # * - Camera Information.

* # 872564 # - USB or control.

* # 301279 # - HSDPA / HSUPA Control Menu.

* # 7465625 # - phone lock status.

* # * # 7780 # * # * - Factory re - store settings. The system

will delete all data including the Google account.

* 2767 * 3855 # - Factory Format setting. All internal and external data

can be deleted and re firmware - will be installed.

* # * # 4636 # * # * - Phone and Battery Information.

* # * # * # 273283 * 255 * 663282 * # * - File Copy Screen. All images,

sound, video, voice memo can not be backed up.

* # * # 197328640 # * # * - Service Mode code. Changing

the settings for a variety of test and.

* # * # 7594 # * # * - this code into your inda Call / Power

button is becoming a Direct Power Off button.

* # * # 8255 # * # * - G Talk service monitor code.

* # * # 34971539 # * # * - Camera Information. Do not use the option

to update the camera firmware. The functions of your camera will be closed.


W-LAN, GPS and Bluetooth Test Codes:


* # * # 232339 # * # * OR * # * # 526 # * # * OR * # * # 528 # * # * - W-LAN test code.

Use the menu button to start Test.

* # * # 232338 # * # * - WiFi Mac address.

* # * # 1472365 # * # * - GPS Test.

* # * # 1575 # * # * - Another GPS test code.

* # * # 232331 # * # * - Bluetooth test code.

* # * # 232337 # * # - Bluetooth device inapharmesatesa


* # * # 0588 # * # * - Proximity sensor test.

* # * # 0 * # * # * - LCD test.

* # * # 2664 # * # * - Touch screen test.

* # * # 2663 # * # * - Touch screen version.

* # * # 0283 # * # * - loop back packets.

* # * # 0673 # * # * OR * # * # 0289 # * # * - Test melodi.

* # * # 3264 # * # * - RAM version of the test.
Share:

Install Bangla Font on Any Android Devices

Install Bangla Font on Any Android Devices

Most Bangali User wants Bengali language support for their Android Samartphone.

Here is an app that can install bangla font in any android devices


Download Bangla font

Installation : (For Samsung Only )
  • Download the file in your PC and transfer to Phone
  • Open the downloaded file by tapping, in your device and Install
  • Go to Settings > Display > Font style and Select BanglaFont, tap OK then tap “Restart now”.


Installation : (For Other Android )

Just install and forget . Its done for you .

Now How to write bangla in Any android ?

First install this font to your phone its impotent because without it you wont be able to read bangla in Android Market and then download any keyboard from below & Install it.


Another Method For install bangla font in your android devices...

1.Download solaimanlipi2.0.ttf(new version) font. Rename it to DroidSansFallback.ttf
2. Go to your device's system>fonts> folder and replace the "DroidSAnsFallback.ttf" font with yours. Use file manager that can access you root folders such as: root explorer or file manager HD
3. Restart your device and it should be rendered with native bangla support.

DOWNLOAD Solaimanlipi Font

Enjoy...

NOTE: Many android of symphony and walton has bangla support .. thats mean you can read bangla without installing any font ... like w60 .. but if your android fails to do so then use the flowing application to make it works.
Share:

INSTALLATION INSTRUCTIONS

INSTALLATION INSTRUCTIONS:

First you need to root your device then continue...

1. Download NEMESIS TWO TITANIUM ZIP from here: Dev-Host - NEMESIS_TWO_TITANIUM_SIGNED.zip - The Ultimate Free File Hosting / File Sharing Service
2. Place the downloaded zip to your sdcard (not inside any folder).
3. Switch off your phone.
4. Now press volume up, home and power button together until the Android recovery shows up.
5. Select Wipe Data. Then select wip cache. Choose "Yes" both times.
5. Select: Update zip from SD Card.
6. Navigate with the volume buttons, and choose Nemesis Titanium Zip with your home button.
7. Choose "Yes" again. Installing wil start.
8. When done, you will be asked to reboot your phone.
9. Go back to the main menu and reboot.
10. Enjoy!!!


Please report bugs if any. The team will be happy to update you with bugfixes in the form of OTA updates.


KNOWN BUGS AND FAQ:


1. Mobile network not working.


Reset your APN.

Go to mobile data -access point -press left button -reset to default

Done.

2. Settings app has weird titlebars
Hehe, sorry about that, that's a graphic error, will fix soon.

3. Some options in Nemesis Hub force close.
Again, that's something we're fixing, expect an update soon.

4. I hate colors.

Well, it's time to try out something fresh and new. Otherwise try out the thousands of other roms that,

unfortunately, look the same.


5. Nice Rom! Smooth and fast!
Well thank you!

6. Can I use xxxx kernel?
This Rom is kernel free, so use any kernel you want. In case of Kernel issues, clarify with the kernel dev.

7. XXXX app is isn't working!
Ask the developer of the app.

8. I hate some things in the Rom, can I change it?
Of course! Nemesis 2 is free for anyone to modify. But if you want to publish your work, please do so in our

forums ONLY.

Disclaimer : Do it your phone at your risk. I will not be responsible for any problem in damage your phone .

Thanks Nemesis Team
Share:

Nemesis titanium a super custom rom for galaxy y s5360

AFTER IMMENSE POPULARITY OF NEMESIS ONE AND PHOENIX HERE IS THE NEMESIS TEAM BACK AGAIN WITH A AWESOME NEW ROM
NEMESIS TWOTM[codename~TITANIUM]
ROM IS BRACED WITH A AWESOME UI THAT IS COOLER AND MUCH COLORFUL THAN EVER!
IT IS NOT LIKE JELLYBEAN.......BUT IT IS LIKE "NEMESIS"[UNIQUENESS REDEFINED]
VIBRANT COLORS....UNIQUE THEME.......SIMPLY COOL!
AN AWSOME UI.
SIMPLE-ELEGANT-UNIQUE
NEMESIS2 HAS A UI THAT YOU WILL NEVER FORGET......SOMETHING ALL WILL LOVE!
FIRST EVER UI TO COMBINE MONOCHROME+VIBRANT COLORS IN A UNIQUE COMBO!
AN AWESOME NEW LAUNCHER WITH NEW VIBRANT ICONS!!
SMOOTH-FAST-VIBRANT!

ALL NEW NEMESIS HUB!
ALL THE NECESSARY APPS AND TWEAKS AT ONE PLACE!
PARANOID ANDROID LIKE DIFFERENT TITLE COLOUR!
EVERYTHING YOU WILL EVER NEED FROM UI TWEAKS TO SUPPORT ALL INTEGRATED IN ONE PLACE!
JUST START THE APP AND GET IT ALL!
ALL NEW SYSTEM UI!
ALL NEW LOOKS!
MONOCHROME ICONS WITH VIBRANT TOGGLES!
IT's NOTHING LIKE ANYTHING(YEP,its TITANIUM )
++KERNEL FREE-SO NOW YOU ARE FREE TO USE ANY KERNEL++
++WITHOUT COMPATIBILITY PROBLEMS!!!++
LOW RAM USAGE-GIVES YOUR PHONE SOME MORE SPACE TO BREATH WITH ALL THOSE HEAVY APPS!
Share:

WESPRO NS721A Updating guide with File

[Guide] WESPRO NS721A Updating guide with File

WESPRO NS721A Updating guide with File Tested by me
1.) Download the software given in the below link from your normal computer.


2.) After download, please extract it using winrar ( If you do not have Winrar then please install it ).


1.) After extracting the software you will find below files.

a. Android folder.

b. Instructions.pdf

c. Newyoutbe.apk

d. WInhex1 software

e. Start_sector.001 file


2.) You will require converting normal SD card into special SD card .Use the instructions.PDF file to convert your blue color SD card into Special SD card.


3.) You need to follow the process in instructions.pdf till PAGE NO 3 only. Please use SD card as given below (Please do not use any other microSD card or adaptor card).


4.) Kindly copy the android folder & Newyoutube.apk file in to SD card & put netbook on charge.

Switch off the netbook and insert the memory card in the slot.


5.) Switch on the netbook . It will start updating the device with new OS.


6.) After upgrade, remove the blue color SD card and restart the Netbook. It will take 7-10 mins.


7.) Once your netbook is started, insert the same memory card in to the netbook.


8.) Go to main Menu, Go to My Pad Application. Click on the “SD1” on the top right hand corner. Click on new youtube.apk to install youtube player. Click on install to continue. Click on done when finished.


9.) You can use your netbook NS721A Now.
Share:

without iTunes Add music to newly created iPhone playlis

without iTunes Add music to newly created iPhone playlis

Easily manage iPhone without iTunes
CopyTrans Manager: The free iTunes alternative to manage iPhone, iPad and iPod without iTunes.

Get full control over your iPhone!
Download
Share:

Unlock Root for Android

[root] Unlock Root for Android ( support most of Android )

[root] Unlock Root for Android ( support most of Android )

There is a website UnlockRoot/UnlockPhone/UnlockFlash---Android Root claiming that they can root most Android devices in market.


Well, I've never tried it but if you're running out of idea on how to root your Android phones. Give it a try ( at your own risk ).

Supported Android device list
Share:

Backup SMS and Restore on Android

Backup SMS and Restore on Android

Newbie guide: Backup SMS and Restore on Android


How many times have you lost your text messages after a phone crash? Or have actually forgotten to backup SMS before updating your phone or installing a new firmware which would wipe / delete all your data and text messages. There are a number of apps available in the Google Play Store to backup and restore SMS on Android phones, but the best one we like is: SMS Backup & Restore.

SMS Backup & Restore allows you to backup your text messages from any Android phone. It is a very small app, but works flawlessly on any Android phone available in the market and is compatible with Android 1.5 and above.


SMS Backup & Restore Features:

The main features of this simple app includes:

Backup SMS messages in XML format.
Automatic scheduled backups – Automatically backup text messages.
View backup contents on the phone.
Option to backup selected conversations.
Email a backup file.
Delete all SMS messages on the phone.

Backups are created in XML format and saved to your device’s SD card. That XML file can then be converted to other formats, and can also be viewed on a computer. You can also e-mail your backup files easily anywhere you wish from within the app.
How to Backup SMS Messages on Android

Want to backup your text messages? Follow the simple instructions below:

Step 1 -Download and install SMS Backup & Restore on your Android phone.


Step 2 - Tap the Backup button to proceed.

Step 3 - Enter a filename and press OK to proceed. Backup process will start now.

Step 4 - That’s it. Your phone will vibrate when the backup is over and will show you a report.

SMS backup process has been completed! Now if at any point you want to restore your SMS messages back on your Android phone, we have instructions for that as well. See below.


How to Restore Text Messages on Android
Step 1 - Open SMS Backup & Restore.

Step 2 - Tap the ‘Restore’ button.

Step 3 - Select the backup file and tap the OK button for the similar restore process to start.

Step 4 - That’s it. Your phone will vibrate when the restore is over and will show you a report.

These are very simple and easy steps

Share: